I'm not sure if I ever mentioned this, but I almost never plan out my spinning projects ahead of time. I just grab some fiber and fiddle with the wheel til things feel "right" and go for it...which is great if you don't have a project in mind for the end result, but lately I have felt the urge to spin yarn for specific projects. By now, I know my wheels well enough that I have a general idea of what will work to produce the yarn I want, but I thought it was better to err on the side of caution and spin some samples to be absolutely certain.
I happened to receive a pretty handy gadget from Spinzilla (which arrived broken, regrettably, but the good news is that the most important part was still usable...plus, there's always tape). Not only is this a nice tool to quickly identify the weight of any yarn, I have been using it to check my singles as I spin to make sure they are (reasonably) consistent. So, when I was spinning a sample for the yarn which ultimately was to be used for a sport weight cardigan, I made sure that my singles were a thin fingering weight (ideally, a little thinner than the line for fingering yarn on the gauge - and please pardon my chipped manicure below).

 For my super bulky Swalesdale project (which will - eventually - become a very sturdy sweater), I'll be using my Louet Victoria wheel, which has a different build than the Ladybug above - when I remove the flyer, I don't have to also remove the drive band from the ratio settings (ie, I don't have to take a reference photo). Each Swalesdale single needs to be sport weight, which I'll then n-ply into a Bulky:

After I spun each sample, I let the singles rest, as I would if I were spinning a larger project. The next day, I plied them, then washed them in a no-rinse wool wash (Allure):
 After that, it was time for the moment of truth: measuring them once again to make sure I was hitting my mark! It must have been beginner's luck, because both of my samples turned out to be exactly what I was aiming for.
 I've heard that it's a good idea to take the samples and keep track of their details such as what wheel you used, how you spun them, fiber content, etc. I'm not sure if I'm ready to start a spinning sample notebook just yet, but perhaps that will be a project I embark on next year as the nature of my spinning starts to change from "just for fun" to "project based."
I'd love to hear any of your sample spinning tips in the comments!
I happened to receive a pretty handy gadget from Spinzilla (which arrived broken, regrettably, but the good news is that the most important part was still usable...plus, there's always tape). Not only is this a nice tool to quickly identify the weight of any yarn, I have been using it to check my singles as I spin to make sure they are (reasonably) consistent. So, when I was spinning a sample for the yarn which ultimately was to be used for a sport weight cardigan, I made sure that my singles were a thin fingering weight (ideally, a little thinner than the line for fingering yarn on the gauge - and please pardon my chipped manicure below).

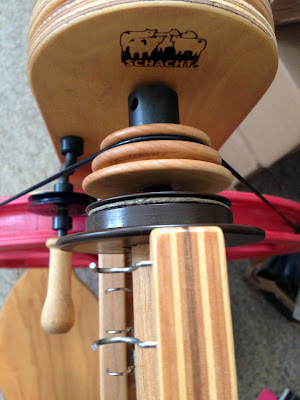
Sometimes, I take a photo of my wheel settings if I'm worried that I'll forget which ratio I was using so that I have it to refer back to later.


After I spun each sample, I let the singles rest, as I would if I were spinning a larger project. The next day, I plied them, then washed them in a no-rinse wool wash (Allure):


I'd love to hear any of your sample spinning tips in the comments!
Comments
Post a Comment